How to Optimize Your Warehouse Layout for Faster Fulfillment

If you could make one change to your warehouse that would immediately improve speed, accuracy, and worker satisfaction, what would it be? For most operations, the answer is surprisingly simple: fix the layout.
Research consistently shows that travel time accounts for over 50% of total picking time in a typical warehouse. That means your team could be spending more than half their shift simply walking between locations rather than doing productive work. Unlike automation projects or software overhauls, a layout optimization requires little to no capital investment, yet it can deliver measurable gains in throughput and fulfillment speed within days.
This guide walks you through a practical, step-by-step approach to redesigning your warehouse layout for faster fulfillment. Whether you run a small e-commerce operation or a large 3PL facility, these principles apply.
Step 1: Map Your Current Flow
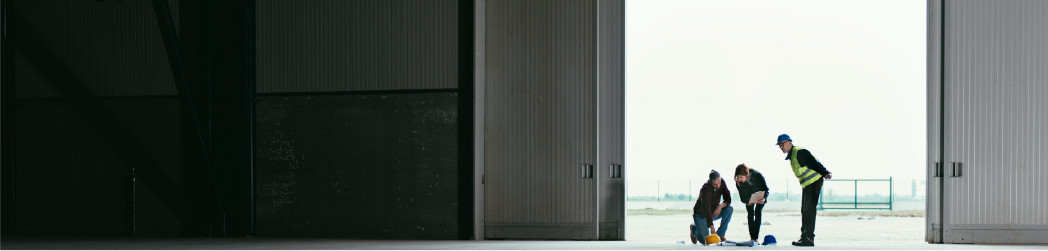
Before changing anything, you need a clear picture of how goods and people actually move through your warehouse today. This is not about how things are supposed to work according to a process document. It is about what really happens on the floor.
Start by documenting the path of goods from the moment they arrive at receiving through storage, picking, packing, and shipping. Walk the floor yourself and follow an order from start to finish.
Next, create a spaghetti diagram. This is a simple but powerful visual tool where you trace the actual walking paths of workers on a floor plan over a set period of time. After even 30 minutes of observation, patterns will emerge:
- Crossover points where inbound and outbound paths intersect, creating congestion and safety risks.
- Backtracking where pickers have to double back because related items are stored far apart.
- Bottlenecks where workers queue up waiting for access to a particular aisle, station, or piece of equipment.
- Dead zones where valuable floor space is underutilized or filled with slow-moving inventory.
Document these findings with a floor plan sketch and notes. This baseline is essential for measuring improvement later.
Step 2: Choose Your Flow Pattern
The overall flow pattern of your warehouse determines how efficiently goods move from dock to dock. There are three primary patterns, and the right one depends on your facility and operation type.
U-Shaped Flow
In a U-shaped layout, receiving and shipping docks are located on the same wall of the building. Goods travel in a U-pattern through the facility. This is ideal when you have limited dock space or a single loading area, and it allows cross-docking and easier supervision since inbound and outbound activity happen in close proximity. The downside is that inbound and outbound traffic can compete for the same space if not carefully managed.
I-Shaped (Through) Flow
Here, receiving is on one end of the building and shipping is on the opposite end. Goods flow in a straight line. This pattern works best for high-volume operations with dedicated receiving and shipping docks, as it minimizes congestion by physically separating inbound and outbound activity. The trade-off is that it requires more linear space and can increase travel distance for workers who need to move between both ends.
L-Shaped Flow
An L-shaped layout is a practical compromise when your building footprint or dock placement does not lend itself to a clean U or I pattern. Receiving and shipping docks are on adjacent walls, with goods turning a corner as they move through the facility.
When evaluating which pattern suits your operation, consider your dock locations, daily volume, the ratio of inbound to outbound activity, and whether you do any cross-docking. In many cases, a U-shaped flow offers the best balance of flexibility and efficiency for small to mid-sized warehouses.
Step 3: Apply ABC Analysis to Slotting
Not all products are created equal when it comes to how often they are picked. ABC analysis is a method of categorizing your inventory by velocity, and it should directly drive where items are stored.
- A items are your top 20% of SKUs by pick frequency. These typically account for roughly 80% of your picks. Place them closest to packing stations, at ergonomic pick heights (waist to shoulder level), and along the most accessible aisles.
- B items are moderate movers. Slot them in the middle zone, still reasonably accessible but not occupying prime real estate.
- C items are slow movers. These go furthest from the packing area, on higher or lower shelves, or in less accessible locations.
The key decision here is whether to use static slotting or dynamic slotting. Static slotting assigns a fixed location to each SKU and is simpler to manage, but it does not adapt to changing demand patterns. Dynamic slotting reassigns locations based on current velocity data, which keeps your fastest movers in the best spots even as demand shifts seasonally. Dynamic slotting requires more discipline and ideally software support, but the efficiency gains are significant, especially for operations with seasonal fluctuations.
Review your slotting at least quarterly. Many warehouses set their slotting once and never revisit it, which means last year’s top sellers may still be occupying prime locations even though they have been replaced by new fast movers.
Step 4: Optimize Aisle Width and Racking
Your aisle configuration directly affects both storage density and picking speed. The goal is to find the right balance for your operation.
- Wide aisles (12 feet or more) are necessary if you use forklifts or reach trucks. They allow two-way traffic and faster movement but consume more floor space.
- Narrow aisles (8 to 10 feet) work well with order pickers or manual carts. They increase storage density but limit equipment options and traffic flow.
- Very narrow aisles (6 feet or less) maximize storage capacity and require specialized equipment like turret trucks. These are best suited for high-density storage of slower-moving items.
Consider a mixed approach: wide aisles in high-traffic picking zones where speed matters most, and narrower aisles in bulk storage or slow-mover areas where density is the priority.
Do not overlook vertical space. Many warehouses underutilize the space above the first eight feet. Adding taller racking with appropriate pick equipment, mezzanines for packing stations or storage, or even simple overhead shelving for packing supplies can significantly increase your usable capacity without expanding your footprint.
Step 5: Design Efficient Packing Stations
Packing stations are where orders come together, and a poorly designed station can become a major bottleneck. Small improvements here have an outsized impact on both speed and accuracy.
Design each station with these principles in mind:
- Materials within arm’s reach. Boxes, tape, filler, labels, and packing slips should all be accessible without the packer needing to step away from the station. Every trip to grab supplies is wasted time.
- Standardized station layouts. Every packing station should be set up identically so that any worker can step into any station without reorientation. This also makes training faster.
- Ergonomic design. Adjustable-height work surfaces, anti-fatigue mats, and proper positioning of scanners and screens reduce strain and keep packers productive through long shifts.
- Proper lighting. Packers need to verify items, read labels, and inspect for damage. Inadequate lighting increases error rates and causes eye strain. Aim for bright, even, shadow-free illumination at the work surface.
Consider the flow into and out of the station as well. Picked orders should arrive on one side, and packed orders should exit on the other, moving naturally toward the shipping area without crossing paths with incoming work.
Step 6: Create Clear Zones and Visual Management
A well-organized warehouse communicates its layout visually so that workers, including new hires and temporary staff, can navigate it intuitively.
Floor markings are the foundation. Use painted lines or durable tape to define:
- Pedestrian walkways and forklift lanes
- Staging areas for inbound and outbound shipments
- Packing station boundaries
- Hazard zones around equipment or docks
Color coding by zone makes navigation faster. For example, use blue for receiving, green for storage, yellow for packing, red for shipping, and orange for returns. Apply these colors consistently across floor markings, signage, rack labels, and even bin colors.
Signage should be large, clear, and visible from a distance. Label every aisle, rack section, and zone. Overhead hanging signs are particularly effective in large facilities where wall-mounted signs get blocked by racking.
Visual management is not just about efficiency. It is also a safety measure. Clear markings prevent collisions between pedestrians and equipment, define safe zones near dock doors, and ensure emergency exits remain unobstructed. OSHA guidelines provide specific requirements for aisle marking and clearances that should inform your visual management plan.
Step 7: Test, Measure, and Iterate
Layout optimization is not a one-time project. It is an ongoing process of refinement based on real data.
Before making major changes, consider running a pilot in one section of the warehouse. Rearrange a single zone or aisle according to your new plan, measure the results over one to two weeks, and gather feedback from the workers who use it daily. Their input is invaluable since they know the pain points that are invisible from a floor plan.
Track these key metrics before and after changes:
- Lines picked per hour as a measure of picking productivity
- Average travel distance per order to quantify layout efficiency
- Error rate at packing and shipping to measure accuracy impact
- Order cycle time from pick assignment to shipment
- Worker feedback scores on ease of navigation and physical strain
Video analysis tools like Rabot can reveal movement patterns and bottlenecks that are difficult to spot through manual observation alone. By analyzing actual worker paths and station activity, you get objective data to guide your next round of improvements rather than relying on assumptions.
Make layout reviews a regular part of your operations cadence. A quarterly review of slotting data, flow patterns, and worker feedback will keep your layout aligned with your current business reality.
Quick Wins You Can Do This Week
You do not need a full redesign to start seeing results. Here are changes you can make right away with little or no cost:
- Re-slot your top 10 fastest-moving SKUs to the closest and most ergonomic pick locations. Even moving a handful of high-velocity items can cut significant travel time.
- Clear aisle obstructions. Walk every aisle and remove anything that does not belong: misplaced pallets, empty boxes, abandoned equipment. Clear aisles mean faster, safer movement.
- Relocate packing supplies to the point of use. If packers are walking to a central supply area for tape or boxes, set up satellite supply stations at each packing station instead.
- Add or improve zone signage. Print large, clear labels for every aisle and section. Even simple paper signs taped to end caps make a difference for new workers.
- Establish a designated staging area for outbound orders so that packed shipments are not blocking packing stations or aisle access.
- Separate your returns processing area from your main fulfillment flow. Returns create unpredictable work and should not compete with outbound orders for space or attention.
- Hold a 15-minute floor walk with your team and ask them to point out the biggest layout frustrations they deal with daily. The people doing the work often have the best ideas for fixing it.
Getting Started
Warehouse layout optimization is one of the highest-return investments you can make in your operation, and most of it costs nothing but time and intentional planning. Start with observation, apply these principles systematically, and measure the results.
The most successful warehouses treat their layout as a living system that evolves with their business, not a fixed floor plan that was set once and forgotten. By committing to regular review and iteration, you build an operation that gets faster and more efficient over time.
Ready to see how your warehouse floor is really performing? Get in touch with the Rabot team to learn how video-powered analytics can give you the visibility you need to optimize with confidence.